简介
安装编译启动
安装
下载
- 下载:http://ofbiz.apache.org (http://www.apache.org/dyn/closer.lua/ofbiz/apache-ofbiz-13.07.02.zip)
- 解压:apache-ofbiz-13.07.02.zip到D:\java\apache-ofbiz-13.07.02(路径可自己更改)
- 使用版本apache-ofbiz-13.07.02的要求是JDK版本至少1.7以上(ofbiz已经封装好了tomcat,在framework-catalina-lib下)
启动
命令行启动
- 先cmd进入到命令行模式下,cd到你当前的OFBiz的工作环境(D:\java\apache-ofbiz-13.07.02),也就是你的解压环境。
- 然后运行 ant load-demo。第一次编译大概需要10分钟。提示”BUILD SUCCESSFUL”即表示部署成功
- 再运行ant start 。出现类似“finished in [1328] milliseconds”就表示启动服务器成功
- 访问前台http://localhost:8080/ecommerce 可设置语言为中文,现点击几个链接体验一下。
访问后台https://localhost:8443/ordermgr
- 提示:此网站的安全证书存在问题。点击“继续浏览此网站(不推荐)。”
- 默认用户名密码:admin/ofbiz
管理员工具页面:https://localhost:8443/webtools
- 停止服务:定位到OFBiz启动的shell,按下Ctrl+C。我们将看到shell显示提示: 终止批处理操作吗(Y/N)? 输入Y来终止服务
- 还有一种就是重新打开shell,并定位到该文件夹,使用命名:ant stop
- 获取可用命令列表:ant –p
- 启动乱码
- Windows:修改tools/startofbiz.bat文件中的代码为(主要设置了UTF-8)”%JAVA_HOME%\bin\java” -Xms128M -Xmx512M -XX:MaxPermSize=512m -Dfile.encoding=UTF-8 -jar ofbiz.jar
- Linux:修改tools/startofbiz.sh文件中代码MEMIF=”-Xms128M -Xmx512M -XX:MaxPermSize=512m” 为 MEMIF=”-Xms128M -Xmx512M -XX:MaxPermSize=512m -Dfile.encoding=UTF-8”
- 部署到eclipse
- 从svn检出(速度可能有点慢):在页面http://ofbiz.apache.org/source-repositories.html 找到相应的svn地址,如“release13.07: $ svn co http://svn.apache.org/repos/asf/ofbiz/branches/release13.07 ofbiz.13.07”
表示版本ofbiz.13.07的svn地址为http://svn.apache.org/repos/asf/ofbiz/branches/release13.07 ,检出的项目命名为testOFBiz13.07 - 直接从svn上检出的代码会有错误,这是因为有的代码是编译后才生成的,所以我们需要运行ant.bat进行编译,编译完毕后刷新工程即可清除错误
- 在ant窗口-add buildfiles-找到项目testOFBiz13.07-选择根目录下的build.xml-完成
- 第一次访问,要先在ant窗口双击load-demo,显示BUILD SUCCESSFUL则表示项目安装成功(第一次部署时间很长且有很多警告)。以后在ant窗口双击build[default]部署一下项目即可
- 然后双击build目录下的start启动服务(控制台显示No crashed jobs to re-schedule则启动成功)。使用stop终止服务
- 在浏览器访问http://localhost:8080/ecommerce 和 https://localhost:8443/ordermgr 用户名/密码 admin/ofbiz
- 第二种部署到eclipse中的方法是先将压缩包下载下来,再导入到eclipse中
- 从svn检出(速度可能有点慢):在页面http://ofbiz.apache.org/source-repositories.html 找到相应的svn地址,如“release13.07: $ svn co http://svn.apache.org/repos/asf/ofbiz/branches/release13.07 ofbiz.13.07”
OFBiz目录结构
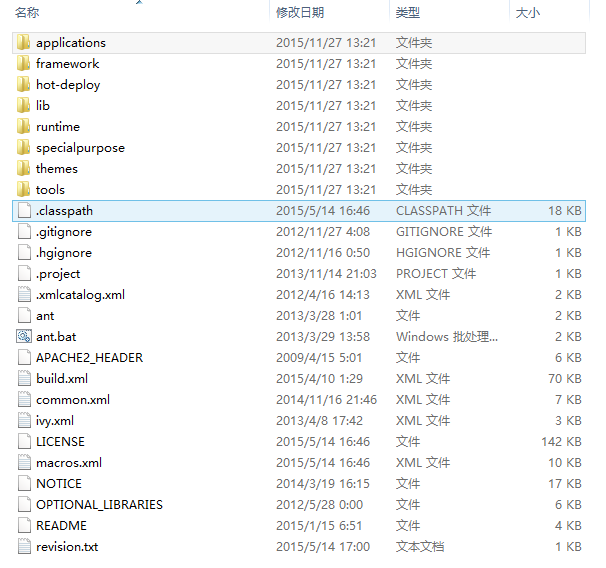
- Applications目录
- Applications目录包含了OFBiz核心的应用程序组件,如订单管理,电子商务存储等。
- component-load.xml文件配置需要载入哪几个应用程序组件。这里的每一个组件,都是一个基于OFBIZ构建的Web应用程序。
- framework目录
- Framework框架目录,包含OFBiz框架的组件,例如实体引擎和服务引擎。这是OFBiz框架的核心,其他应用程序都是基于它来构建的。
- component-load.xml文件配置需要载入哪几个框架组件。
- specialpurpose目录
- specialpurpose专门目录,包含一些其他的应用程序,不是OFBiz核心的一部分。包含更多的OFBiz打包的应用程序和组件。
hot-deploy热部署目录,以后创建的项目,都需要在这个目录下进行部署。结构如下:
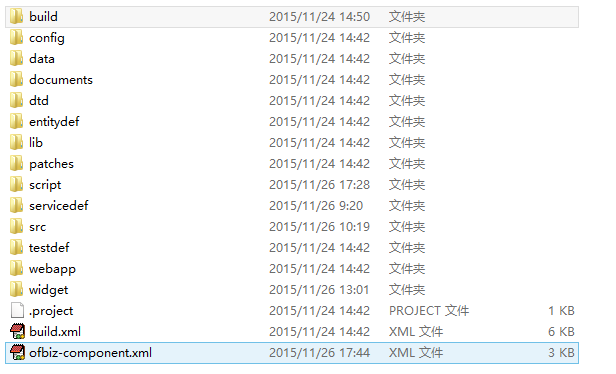
- build.xml:Ant编译使用,不需要修改
- ofbiz-component.xml:加载当前组件中所有的内容和文件使用
- config目录:该文件夹内主要是配置文件(.properties)及国际化标签信息(.xml)
- data目录:该文件夹内主要是存放下拉/字典类数据;Demo数据;权限数据;操作帮助数据在ofbiz-component.xml中引用
- document目录:该文件夹内主要是存放文档数据,比如调用data中的helpdata下的帮助文档数据
- dtd目录:dtd文件用于定义合法的XML文档构建模块,如上图中引用的dtd中xsd规范
- entitydef目录:包含两种文件实体定义文件和eca文件
- lib目录:存放jar包
- script目录:存放基于minilang编写的方法,调用方式如下;可以传入和输出参数
- servicedef目录:存放业务系统所需要执行的所有服务,而服务可以通过各种方式实现(java,webservice,minilang等等)同时这个文件夹和entity一样会存放服务对应的eca文件,实现也是同样,用作捆绑服务操作的行为
- src目录:存放系统所需要执行的java方法,而服务可以调用java实现(java,webservice,minilang等等)
- testdef目录:存放单元测试方法的地方,详细见ofbiz单元测试
- webapp目录:如同其他web项目
- 存放web.xml
- 前端页面(ftl为主,被widget中的screen.xml调用)
- action内存放groovy方法
- controller.xml 控制请求
- widget目录:存放XXXscreen.xml,被controller调用,XXXscreen.xml做两件事,一个是拼接html页面,通过嵌套,等方式最终引用webapp中的ftl或者jsp或者XXXscreen.xml中直接编写页面;另外一个就是赋值,通过action方法对前端的model或者参数赋值。
build.xml命令
load-demo加载所有组件中的data数据(data文件夹中xml配置文件, 以<entity-engine-xml>开头),每次load时不会删除原来的数据,只会新增,且不会重复新增clean-all删除所有runtime 文件夹中下的logs、data文件夹中的数据。(derby数据库在data文件夹中)
编译扩展
设置hot-deploy下组件(component)编译顺序
hot-deploy/build.xml1
2
3
4
5
6
7
8
9
10
11
12
13
14
15
16
17
18
19
20
21
22
23
24
25
26
27
28
29
30
31xml version="1.0" encoding="UTF-8"
<project name="OFBiz hot-deploy Build" default="build" basedir=".">
<filelist id="hot-deploy-builds" dir="."
files="ubase/build.xml,
aplcodecenter/build.xml"/>
<!--运行build命令时-->
<target name="build">
<iterate target="jar" filelist="hot-deploy-builds"/>
<!--除去不需编译的组件-->
<!--
<externalsubant target="jar">
<filelist refid="hot-deploy-builds"/>
</externalsubant>
-->
<externalsubant target="build">
<filelist dir=".">
<file name="umetro/build.xml"/>
</filelist>
</externalsubant>
</target>
<!--运行clean命令时执行-->
<target name="clean">
<iterate target="clean" filelist="hot-deploy-builds"/>
<!--除去不需clean的组件-->
<externalsubant target="clean">
<filelist dir=".">
<file name="umetro/build.xml"/>
</filelist>
</externalsubant>
</target>
</project>
设置hot-deloy下组件单独clean:在项目根目录下的
build.xml中加入1
2
3<target name="_clean-hot-deploy" description="clean hot-deploy jar">
<hotdeployant target="clean"/>
</target>
创建模块
- Ant界面双击create-component
- 弹出如下对话框,输入项目名”aezo”,点击OK
- 点击OK后又会出现类似一个这样的对话框,继续输入”aezo”(注意大小写,按照他提示的命名示例进行命名),点击OK。加上上个步骤一共输入4次。
- 输入4次后会弹出一个对话框,选择Y,点击OK即可
- 刷新hot-deploy目录就会看到”aezo”的项目
Debug
一般的Debug
- 项目右键-配置debug
- new一个debug调试
- 配置运行类org.ofbiz.base.start.Start
- 设置内存大小:arguments-VM arguments 为 -Xms256m -Xmx512m -XX:MaxPermSize=256m
- 新增源码位置
- 配置好后直接在项目想右键运行debug as
- 常见错误
- 乱码:刚才debug配置的最后一项common有设置编码的,和项目一样
- 如果不能使用,尝试再配置一个东西。Environment-New-Name设为LC_ALL,Value设为C,报存
- 报错:Admin socket configured on - /127.0.0.1:10523 Can’t load ESAPI properties。在Build Path 里加上base/config、base/cert、base/dtd几个目录
- 扩展:使用IntelliJ-IDEA注意事项
- 通过Edit Configurations进入,点击 + 号,新建一个application
- Main Class:org.ofbiz.base.start.Start
- Before launch里面将make动作去掉。原因是我们通过ant进行build,所以无需make再次编译
- 点击Debug启动
远程Debug
- 归纳:
Attach to remote JVM- localhost:8092(-agentlib:jdwp=transport=dt_socket,server=y,suspend=n,address=8092) - Use module classpath选择整个项目 - 启动本地项目和远程项目
- Eclipse中,在ant窗口找到该项目的build目录,再执行start-debug命令
- 直接运行tools文件夹中的startofbiz.bat或者startofbiz.sh(linux平台),运行前先修改startofbiz.bat中的
"%JAVA_HOME%\bin\java" -Xms128M -Xmx512M -XX:MaxPermSize=512m -jar ofbiz.jar为"%JAVA_HOME%\bin\java" -Xms128M -Xmx512M -XX:MaxPermSize=512m -Xdebug -Xnoagent -Djava.compiler=NONE -Xrunjdwp:transport=dt_socket,server=y,suspend=n,address=8091 -Dfile.encoding=UTF-8 -jar ofbiz.jar - 以上只是修改了启动时的参数,startofbiz.sh同理
- 是打开Run-Debug Configurations-Remote Java Application-右键new
- Name随便取;Project选择需要调试的项目(不是hot-deploy目录下的组件,而是ofbiz顶级目录,如ofbiz-release13.07);Connection Type选择Standard(Socket Attach);Host为远程服务器的ip地址(如果是本地项目可以为127.0.0.1),Port为8091(端口可以修改,但要和build.xml中配置的start-debug参数中的端口一样)。
- 点击Applay,再点击Debug即可
- 看到此图 第四个图标变亮则表示启动成功,即可进行断点测试;如果测试完成再次点击此图标即可关闭debug,项目仍可正常运行,下次再次点击 此debug按钮即可进入debug环境。
- 如果提示错误”Failed to connect to remote VM. Connection refused.Connection refused: connect”,可以勾选Debug配置中的”Allow termination of remote VM”再次尝试
- 注意:只要选择的Project中的本地代码的源码文件和远程服务器一样便可以准确的定位到每一行;当使用远程调试ofbiz项目时,修改java文件不需要重新启动或部署(他会实时编译),但是如果修改了service.xml或者entitymodel.xml相关的文件则需要重启。由此可见远程调试较为方便。
- 如出现错误提示:
Failed to connect to remote VM. Connection timed out.解决办法:关掉服务器的防火墙,在eclipse配置里面将连接的时间设置长点 - 在DOS命令行输入jps –v查看远程端口情况
- 扩展:使用IntelliJ-IDEA注意事项
- 通过Edit Configurations进入,点击 + 号,新建一个remote
- Before launch里面将make动作去掉。原因是我们通过ant进行build,所以无需make再次编译
- classpath选择整个项目
- ant运行start-debug
- 点击Debug连接远程
相关配置
端口配置
一台机器上运行两个ofbiz项目(主要是设置不同的端口)。修改以下端口,不和现有的重复即可。使用netstat –ano查看使用中的端口
OFBIZ_HOME/framework/catalina/ofbiz-component.xml中的ajp默认端口8009,http默认端口8080,https默认端口8443OFBIZ_HOME\framework\webapp\config\url.properties中port.https和port.http的值/framework/start/src/org/ofbiz/base/start/start.properties(会生成ofbiz.jar)ofbiz.admin.port默认为10523/framework/base/ofbiz-component.xml中默认的端口是10991
2
3
4<container name="naming-container" loaders="rmi" class="org.ofbiz.base.container.NamingServiceContainer">
<property name="host" value="0.0.0.0"/>
<property name="port" value="1099"/>
</container>framework/service/ofbiz-component.xml<container name="rmi-dispatcher" loaders="rmi" class="org.ofbiz.service.rmi.RmiServiceContainer">下的<property name="bound-port" value="1099"/>默认为1099
主题定制
- VisualTheme为主题表
1 | <!-- 往视觉风格选项中新增此主题-需要load一下或者将这两段代码在webtools的xml导入中运行一下 --> |
- 每个用户可以自己设置样式,新注册或者在团体里新建的用户有一个默认样式:配置文件在/framework/common/config/general.properties
- 用户配置表为USER_PREFERENCE,中的USER_PREF_TYPE_ID字段为VISUAL_THEME对应的USER_PREF_VALUE的值即为该用户的主题
编码问题
- 首先要保证数据库编码一致
- entityengine.xml文件的datasource的character-set和collate的属性设置一致。
- character-set=”utf8”
- collate=”utf8_general_ci”
- 在链接数据库时,链接数据格式应该为
jdbc-uri="jdbc:mysql://127.0.0.1/ofbizolap?autoReconnect=true&characterEncoding=UTF-8"(注意连接符就是写成&)
- 还有就是虚拟机的启动参数加上
-Dfile.encoding=UTF-8 Build.xml中的修改如下
1
2
3
4
5
6
7
8
9
10
11<target name="start"
description="Start OFBiz (use -Dportoffset=portNumber to shift all ports with the portNumber value)">
<java jar="ofbiz.jar" fork="true">
<jvmarg value="${memory.initial.param}"/>
<jvmarg value="${memory.max.param}"/>
<jvmarg value="${memory.maxpermsize.param}"/>
<jvmarg value="-Dfile.encoding=UTF-8"/>
<arg value="start"/>
<arg value="-portoffset=${portoffset}"/>
</java>
</target>Startofbiz.bat启动乱码,最后几行修改为
1 | echo on |
在ofbiz启动和关闭时进行相关操作
随Ofbiz启动
- 参考 http://blog.sina.com.cn/s/blog_47eb6d9b01000a8w.html
- 在/framework/base/config/ofbiz-containers.xml中注册跟随启动的服务,如在末尾加入
<container name="message-service-container" loaders="main" class="org.ofbiz.message.StartMessageService"/> - 继承org.ofbiz.base.container.Container类,重写init、start、stop、getName方法,项目启动时先会运行init,后会运行start,当项目停止时,默认不会运行stop方法的
随Ofbiz关闭
- 参考文章 http://lf6627926.iteye.com/blog/1843104
- 修改framework/start/src/org/ofbiz/base/start/start.properties的ofbiz.enable.hook=true
- 在自定义启动的container类的init方法中加入如下代码(如org.ofbiz.message.StartMessageService的init方法中)
1 | // 定义关闭线程 |
多环境配置文件
- 工具类
1 | public class DictName { |
- 开发环境启动时, build.xml
1 | <target name="_start-debug" |
- 生产环境启动时, startofbiz.bat
1 | "%JAVA_HOME%\bin\java" -Xms128M -Xmx512M -Dfile.encoding=UTF-8 -Dofbiz.profiles=prod -jar ofbiz.jar |
- 配置文件格式
- base.properties
- base_dev.properties
- base_prod.properties
- 调用
String key = DictName.getPropertyValueByProfiles("base.properties", "myAttr")
子路径入口
1 | <!-- |
邮件配置
- 参考 http://lamadong.blog.163.com/blog/static/207085720093226432980/
- 修改配置文件
framework/common/config/general.properties
1 | defaultFromEmailAddress=默认邮件地址 |
- 调用framework/common/servicedef/services_email.xml中的sendMail服务(此文件中的其他服务也可以调用)
禁用Tomcat的OPTIONS等方法
- 修改
framework/catalina/src/org/ofbiz/catalina/container/CatalinaContainer.java的configureContext方法
1 | // 在方法末尾增加,参考:https://blog.csdn.net/angyuhh07719/article/details/102429412 |
相关安全漏洞(v13.07)
- CVE-2018-8033
- CVE-2020-9496
CVE-2021-26295 (高危)
- 漏洞复现 https://blog.csdn.net/qin9800/article/details/115866288
- 下载https://github.com/yumusb/CVE-2021-26295
- 执行
python exp.py输入OFBiz根地址http://localhost:8080后会进入到命令行 - 输入命令
touch abc会发现OFBiz项目根目录文件创建成功(仅Unix测试成功)
漏洞修复 https://github.com/apache/ofbiz-framework/commit/af9ed4e/
修改
UtilObject.getObjectException为1
2
3
4
5
6
7
8
9
10
11
12
13
14
15
16
17
18
19
20
21
22
23
24
25
26
27
28
29
30
31
32
33
34
35
36
37
38
39
40
41
42
43
44
45
46
47
48
49
50
51
52
53
54
55
56
57
58
59
60// 增加类 SafeObjectInputStream.java (参考github)
// 修改 "org.apache.ofbiz..*" 和增加 "javolution.util..*"
/*
如`com.sun.syndication.feed.impl.ObjectBean`类就不能加入到此白名单中,此类属于[remo](https://mvnrepository.com/artifact/rome/rome/1.0)库中的类;
上文漏洞复现中使用ysoserial进行反序列化,即是基于remo实现(https://github.com/frohoff/ysoserial/blob/master/src/main/java/ysoserial/payloads/ROME.java#L35)
*/
private static final String[] DEFAULT_WHITELIST_PATTERN = {
"byte\\[\\]", "foo", "SerializationInjector",
"\\[Z", "\\[B", "\\[S", "\\[I", "\\[J", "\\[F", "\\[D", "\\[C",
"java..*", "sun.util.calendar..*", "org.ofbiz..*",
"org.codehaus.groovy.runtime.GStringImpl", "groovy.lang.GString",
"javolution.util..*"};
// 修改SafeObjectInputStream构造方法,将JDK8写法转成JDK7
public SafeObjectInputStream(InputStream in) throws IOException {
super(in);
String safeObjectsProp = UtilProperties.getPropertyValue("SafeObjectInputStream", "ListOfSafeObjectsForInputStream", "");
String[] whitelist = safeObjectsProp.isEmpty() ? DEFAULT_WHITELIST_PATTERN : safeObjectsProp.split(",");
StringBuilder sb = new StringBuilder();
for (String str : whitelist) {
String trimmed = str.trim();
if (!trimmed.isEmpty()) {
if (sb.length() > 0) {
sb.append("|");
}
sb.append(trimmed);
}
}
String patternString = "(" + sb + ")";
whitelistPattern = Pattern.compile(patternString);
}
// 修改 UtilObject#getObjectException 方法,方法体直接改成
ByteArrayInputStream bis = new ByteArrayInputStream(bytes);
try {
SafeObjectInputStream wois = new SafeObjectInputStream(bis);
try {
return wois.readObject();
} finally {
wois.close();
}
} finally {
bis.close();
}
```
- CVE-2021-44228
- 参考[网络安全.md](/_posts/linux/网络安全.md)
- 日志框架说明
```bash
# 代码风格log4j
log4j-api-2.3.jar
log4j-1.2-api-2.3.jar
# log4j2实现
log4j-core-2.3.jar
log4j-nosql-2.3.jar
# 也可使用slf4j代码风格
slf4j-api-1.6.4.jar
log4j-slf4j-impl-2.3.jar
漏洞修复:替换framework/base/lib目录下4个log4j的jar包版本为2.12.2及以上版本,此处使用以下版本(log4j-nosql-2.3.jar可不用更换)
- log4j-1.2-api-2.12.4.jar
- log4j-api-2.12.4.jar
- log4j-core-2.12.4.jar
- log4j-slf4j-impl-2.12.4.jar
- 漏洞复现 https://blog.csdn.net/qin9800/article/details/115866288
实体引擎
- SQL执行器
SQLProcessor - 数据库连接池实现类
ConnectionFactory - 连接数据库
DBCPConnectionFactory- mds.getConnection()
JavaAPIz
1 | EntityCondition condition = EntityCondition.makeCondition(UtilMisc.toMap("userLoginId", userLoginId, "groupId", "BUSINESS_ADMIN")); |
实体配置
实体与数据组(逻辑数据库)的关联
entity-group一般被定义在模块
entitydef\entitygroupXXX.xml中,对实体进行分组,使不同的实体分属不同的entity-group。不是所有的entity都进行了entity-group分组,如果没有被分组,系统启动的时候会将实体默认归类到org.ofbiz中1
2
3
4
5<entity-group group="org.ofbiz.olap" entity="CurrencyDimension"/>
<entity-group group="org.ofbiz.olap" entity="DateDimension"/>
<entity-group group="org.ofbiz.tenant" entity="Tenant"/>
<entity-group group="org.ofbiz.tenant" entity="TenantDataSource"/>
查看数据库定义文件
%ofbiz_home%/framework/entity/config/entityengine.xmldelegator将多个group-name组织到一起并将group-name与datasource对应起来。而Datasource定义了数据库驱动,数据库用户名、密码等,所以datasource就是我们说的数据库
1
2
3
4
5<delegator name="default" entity-model-reader="main" entity-group-reader="main" entity-eca-reader="main" distributed-cache-clear-enabled="false">
<group-map group-name="org.ofbiz" datasource-name="localpostnew"/>
<group-map group-name="org.ofbiz.olap" datasource-name="localpostolap"/>
<group-map group-name="org.ofbiz.tenant" datasource-name="localposttenant"/>
</delegator>
通过entity-group将各个实体和数据组之间关联起来,然后将一个或多个数据组归属到一个delegator中。注入delegator则在
web.xml中1
2
3
4
5<context-param>
<param-name>entityDelegatorName</param-name>
<param-value>default</param-value>
<description>The Name of the Entity Delegator to use, defined in entityengine.xml</description>
</context-param>
执行SQL工具类型
1 | // Delegator delegator = (Delegator)request.getAttribute("delegator"); |
Tenant多租户(SaaS)
基本说明
- OFBiz提供Tenant多租户配置,开启后用户需要输入一个数据源(TenantId),从而根据此TanantId从默认数据源获取Tenant、TenantDataSource数据库连接等信息,从而根据对应的数据库连接初始化一个Delegator(“default#tanantId”),之后使用Delegator则是对相应数据源进行操作
- 默认数据源必须要,如用户登录是根据主数据源来的。还需提前创建好Tanant数据源
- Tanant数据源默认是在第一次查询时(
delegator = DelegatorFactory.getDelegator(delegatorName);)进行初始化(会看到控制台检查Tanant数据源表结构日志),此时需要较长时间- 可考虑在项目重启时初始化所有的Tenant数据源
- 开启
TenantUserLogin,可限制某个用户可使用的数据源 - 相关表
- Tenant 租户ID
- TenantDataSource 租户ID数据源
- TenantUserLogin 用户对应租户ID(主库只存此对应关系,实际用户和密码是存在租户库的UserLogin中,主库没有存)
- TenantKeyEncryptingKey
- TenantComponent
- 获取默认Delegator
Delegator baseDelegator = DelegatorFactory.getDelegator(delegator.getDelegatorBaseName()); 流程
1
2
3
4
5
6
7
8
9
10
11
12
13
14
15
16
17
18
19
20
21
22
23
24
25
26
27
28
29
30
31
32
33
34
35
36
37
38
39
40
41
42
43
44
45
46
47
48
49
50
51
52
53
54
55
56
57
58
59
60
61
62
63
64
65
66
67
68
69// 1.org/ofbiz/webapp/control/ContextFilter.java 基于域名(domainName)进行Tenant数据源分流(即不同的域名可配置不同的数据源)
public void init(FilterConfig config) throws ServletException {
// ...
// initialize the delegator
getDelegator(config.getServletContext());
// initialize security
getSecurity();
// initialize the services dispatcher
getDispatcher(config.getServletContext());
// ...
}
public void doFilter(ServletRequest request, ServletResponse response, FilterChain chain) throws IOException, ServletException {
// ...
List<GenericValue> tenants = delegator.findList("Tenant", EntityCondition.makeCondition("domainName", serverName), null, UtilMisc.toList("-createdStamp"), null, false);
if (UtilValidate.isNotEmpty(tenants)) {
String tenantDelegatorName = delegator.getDelegatorBaseName() + "#" + tenantId;
httpRequest.getSession().setAttribute("delegatorName", tenantDelegatorName);
delegator = DelegatorFactory.getDelegator(tenantDelegatorName);
config.getServletContext().setAttribute("delegator", delegator);
}
// ...
}
// 2.XXXFilter.java 可拦截登录进行数据分流,根据请求特征值获取对应Tenant,并将delegatorName写入session
// 3.org/ofbiz/webapp/control/ControlServlet.java 基于用户session进行数据分流
String delegatorName = (String) session.getAttribute("delegatorName");
if (UtilValidate.isNotEmpty(delegatorName)) {
delegator = DelegatorFactory.getDelegator(delegatorName);
}
if (delegator == null) {
delegator = (Delegator) getServletContext().getAttribute("delegator");
}
request.setAttribute("delegator", delegator);
session.setAttribute("delegatorName", delegator.getDelegatorName());
// session使用redis存储,dispatcher无法序列化也就不会存储到session中
// 因此需要先根据delegatorName创建,否则创建的是默认的dispatcher
// Security同理,可使用 security = SecurityFactory.getInstance(delegator); 手动创建
LocalDispatcher dispatcher = (LocalDispatcher) session.getAttribute("dispatcher");
if (dispatcher == null && UtilValidate.isNotEmpty(delegatorName) && delegator != null) {
dispatcher = ContextFilter.makeWebappDispatcher(getServletContext(), delegator);
}
if (dispatcher == null) {
dispatcher = (LocalDispatcher) getServletContext().getAttribute("dispatcher");
}
// 4.org/ofbiz/webapp/control/LoginWorker.java 登录成功,将数据分流信息存入session
public static String login(HttpServletRequest request, HttpServletResponse response) {
String tenantId = request.getParameter("tenantId");
if (UtilValidate.isNotEmpty(tenantId)) {
String delegatorName = delegator.getDelegatorBaseName() + "#" + tenantId;
delegator = DelegatorFactory.getDelegator(delegatorName); // default#T1
dispatcher = ContextFilter.makeWebappDispatcher(servletContext, delegator); // webtools#T1、test/T1
}
setWebContextObjects(...);
}
private static void setWebContextObjects(HttpServletRequest request, HttpServletResponse response, Delegator delegator, LocalDispatcher dispatcher) {
// ...
request.setAttribute("delegator", delegator);
request.setAttribute("dispatcher", dispatcher);
request.setAttribute("security", security);
session.setAttribute("delegatorName", delegator.getDelegatorName()); // 对于开启Tenant非常重要
// 如果是session保存在redis中则下面两个可以不用设置(delegator无法序列化)
session.setAttribute("delegator", delegator);
session.setAttribute("dispatcher", dispatcher);
}
使用
配置好OFBiz的主数据库和tenant多租户数据库
1
2
3
4
5
6
7
8
9
10
11
12
13
14
15
16
17
18
19
20
21
22
23
24
25
26
27
28
29
30
31
32
33
34
35
36
37
38
39
40
41
42
43
44
45
46
47
48
49
50
51
52
53
54
55
56
57
58
59
60
61
62
63
64<!-- framework/entity/config/entityengine.xml -->
<delegator name="default" entity-model-reader="main" entity-group-reader="main" entity-eca-reader="main" distributed-cache-clear-enabled="false">
<!-- 主数据库 -->
<group-map group-name="org.ofbiz" datasource-name="localoracle"/>
<group-map group-name="org.ofbiz.olap" datasource-name="localoracle"/>
<!-- 多租户配置库(一般也存放在主数据库中):里面存放的是每个tenant的数据库配置、默认的模块等信息 -->
<group-map group-name="org.ofbiz.tenant" datasource-name="localoracletenant"/>
</delegator>
<!-- 主数据源去掉了schema参数,schema-name="SAAS" -->
<datasource name="localoracle"
helper-class="org.ofbiz.entity.datasource.GenericHelperDAO"
field-type-name="oracle"
check-on-start="true"
add-missing-on-start="true"
alias-view-columns="false"
join-style="ansi"
use-order-by-nulls="true">
<read-data reader-name="tenant"/>
<read-data reader-name="seed"/>
<read-data reader-name="seed-initial"/>
<read-data reader-name="demo"/>
<read-data reader-name="ext"/>
<read-data reader-name="ext-test"/>
<read-data reader-name="ext-demo"/>
<inline-jdbc
jdbc-driver="oracle.jdbc.driver.OracleDriver"
jdbc-uri="jdbc:oracle:thin:@192.168.1.1:1521:orcl"
jdbc-username="SAAS"
jdbc-password="SAAS"
pool-minsize="2"
pool-maxsize="250"
time-between-eviction-runs-millis="600000"/>
</datasource>
<datasource name="localoracletenant"
helper-class="org.ofbiz.entity.datasource.GenericHelperDAO"
field-type-name="oracle"
schema-name="SAAS"
check-on-start="true"
add-missing-on-start="true"
alias-view-columns="false"
join-style="ansi"
use-order-by-nulls="true">
<read-data reader-name="tenant"/>
<read-data reader-name="seed"/>
<read-data reader-name="seed-initial"/>
<read-data reader-name="demo"/>
<read-data reader-name="ext"/>
<read-data reader-name="ext-test"/>
<read-data reader-name="ext-demo"/>
<inline-jdbc
jdbc-driver="oracle.jdbc.driver.OracleDriver"
jdbc-uri="jdbc:oracle:thin:@192.168.1.1:1521:orcl"
jdbc-username="SAAS"
jdbc-password="SAAS"
pool-minsize="2"
pool-maxsize="250"
time-between-eviction-runs-millis="600000"/>
</datasource>
<!-- 将default下相关的几个datasource的check-on-start属性设置成false,可在启动时不对数据库表结构进行检查,从而加快启动速度 -->
<datasource name="localmysqlolap" check-on-start="false" add-missing-on-start="false" check-pks-on-start="false">
...
</datasource>配置tenant数据库连接等信息
1
2
3
4
5
6
7
8
9
10
11
12
13
14
15
16<!-- framework/entity/data/TenantDemoData.xml -->
xml version="1.0" encoding="UTF-8"
<entity-engine-xml>
<Tenant tenantId="T1" tenantName="测试1"/>
<TenantDataSource tenantId="T1" entityGroupName="org.ofbiz"
jdbcUri="jdbc:oracle:thin:@192.168.1.100:1521:orcl" jdbcUsername="test1" jdbcPassword="test1"/>
<TenantDataSource tenantId="T1" entityGroupName="org.ofbiz.olap"
jdbcUri="jdbc:oracle:thin:@192.168.1.100:1521:orcl" jdbcUsername="test1" jdbcPassword="test1"/>
<!-- See comments on entity def: <TenantUserLogin tenantId="DEMO1" userLoginId="admin" fromDate="2001-05-13 00:00:00.000" thruDate="" isManager="Y"/> -->
<Tenant tenantId="T2" tenantName="测试2"/>
<TenantDataSource tenantId="T2" entityGroupName="org.ofbiz"
jdbcUri="jdbc:oracle:thin:@192.168.1.100:1521:orcl" jdbcUsername="test2" jdbcPassword="test2"/>
<TenantDataSource tenantId="T2" entityGroupName="org.ofbiz.olap"
jdbcUri="jdbc:oracle:thin:@192.168.1.100:1521:orcl" jdbcUsername="test2" jdbcPassword="test2"/>
</entity-engine-xml>- 执行
ant load-demo将此数据添加到group-name="org.ofbiz.tenant"对应的数据库中,或者执行ant create-tenant添加配置到Tenant配置库中,也可以直接进行数据库操作
- 执行
- 修改配置文件
framework/common/config/general.properties中,把multitenant属性改成Y。此时登录页面会显示TenantId输入(具体可查看framework/common/webcommon/login.ftl中multitenant相关代码) - 此时用户输入用户名密码,并输入一个有效的TenantId即可以访问此TenantId相关数据(如果不输入TenantId则为主数据库)
- 此时(框架)使用的是主数据源中的
USER_LOGIN等用户表相关信息 - 此处并没有限制那个用户可以访问那个TenantId,具体配置可见下文
- 此时(框架)使用的是主数据源中的
使用说明
- 通过
request.getAttribute("delegator")获取的Delegator已经是带有Tenant信息的Delegator(Tenant数据源) 自行获取数据源
1
2
3
4
5
6
7// 正确做法(delegator中包含Tenant信息,因此获取GenericHelperInfo也包含Tenant信息)
GenericHelperInfo helperInfo = delegator.getGroupHelperInfo("org.ofbiz");
Connection connection = ConnectionFactory.getConnection(helperInfo);
// 错误做法(此时无法获取到Tenant数据源)
String groupHelperName = delegator.getGroupHelperName("org.ofbiz");
Connection connection = ConnectionFactory.getConnection(groupHelperName);delegator基于entity查询数据时,实体引擎生成的表结构默认带有主数据源的schame
- 如果Oracle使用的是一个数据库,并使用的是不同表空间来完成Tenant,就会导致查询确实连接的是Tenant数据库,但是sql语句包含schame(select * from a.my_table)
- 解决办法,去掉
entityengine.xml中主数据的schame参数配置,从而生成的sql语句默认使用当前数据库连接用户的schame(select * from my_table)
- 解决办法,去掉
- 或使用不同的数据库,使用相同表空间
- 如果Oracle使用的是一个数据库,并使用的是不同表空间来完成Tenant,就会导致查询确实连接的是Tenant数据库,但是sql语句包含schame(select * from a.my_table)
- 通过
使用扩展
- 开启
TenantUserLogin,可指定某个用户只能使用某数据源(可选)- 打开
framework/entity/entitydef/entitymodel.xml中TenantUserLogin的注释 - 打开
framework/entity/entitydef/entitygroup.xml中TenantUserLogin的注释 - 打开
framework/webapp/src/org/ofbiz/webapp/control/LoginWorker.java中TenantUserLogin的注释 - 在
framework/entity/data/TenantDemoData.xml中添加每个用户对应的tenantId,如<TenantUserLogin tenantId="T1" userLoginId="admin" fromDate="2001-05-13 00:00:00.000" thruDate="" isManager="Y"/>(执行ant load-demo)
- 打开
基于用户名自动进行数据分流(可选)
保证
TenantUserLogin中普通用户只能对应一个数据源,管理用户可以对应多个(如admin),则登录时需要输入数据源1
2
3
4
5
6
7
8
9
10
11
12
13
14
15
16
17
18
19
20
21
22
23
24
25
26
27
28
29
30
31
32
33
34
35
36
37
38
39
40
41
42
43
44
45
46
47
48
49
50
51
52
53
54
55
56public class TenantFilter extends ContextFilter {
public void doFilter(ServletRequest servletrequest, ServletResponse servletresponse, FilterChain chain)
throws IOException, ServletException {
HttpSession session = request.getSession();
GenericValue userLogin = (GenericValue) session.getAttribute("userLogin");
String username = request.getParameter("USERNAME");
// admin为超级管理员账号,必须输入tenantId
if(userLogin != null
|| UtilValidate.isEmpty(username)
|| "admin".equals(username)
|| !"default".equals(session.getAttribute("delegatorName"))) {
return;
}
String useMultitenant = UtilProperties.getPropertyValue("general.properties", "multitenant");
if ("Y".equals(useMultitenant)) {
Delegator delegator = getDelegator(config.getServletContext());
List<GenericValue> tenantUserLoginList = null;
try {
tenantUserLoginList = delegator.findByAnd("TenantUserLogin",
UtilMisc.toMap("userLoginId", username), null, false);
if(tenantUserLoginList == null || tenantUserLoginList.size() != 1) {
request.setAttribute("_ERROR_MESSAGE_", "用户数据源信息存在异常");
response.sendRedirect("main");
return;
}
GenericValue tenant = tenantUserLoginList.get(0);
String tenantId = tenant.getString("tenantId");
String tenantDelegatorName = delegator.getDelegatorBaseName() + "#" + tenantId;
// 将数据源信息放到session,供前端界面显示`${(sessionAttributes._tenantName_)!}` (可选)
List<GenericValue> tenants = delegator.findByAnd("Tenant",
UtilMisc.toMap("tenantId", tenantId), null, false);
if(UtilValidate.isNotEmpty(tenants)) {
session.setAttribute("_tenantName_", tenants.get(0).get("tenantName"));
}
// 登录成功后将 delegator、dispatcher、security放入到session中
delegator = DelegatorFactory.getDelegator(tenantDelegatorName);
LocalDispatcher dispatcher = ContextFilter.makeWebappDispatcher(config.getServletContext(), delegator);
Security security = SecurityFactory.getInstance(delegator);
session.setAttribute("delegatorName", delegator.getDelegatorName());
session.setAttribute("delegator", delegator);
session.setAttribute("dispatcher", dispatcher);
session.setAttribute("security", security);
} catch (GenericEntityException | SecurityConfigurationException e) {
e.printStackTrace();
request.setAttribute("_ERROR_MESSAGE_", "获取用户数据源信息出错");
response.sendRedirect("main");
return;
}
}
}
}
将数据源信息放到session,供前端界面显示
${(sessionAttributes._tenantName_)!}。配合上文TenantFilter使用1
2
3
4
5
6
7
8
9
10
11
12
13
14
15
16
17
18
19
20
21// org/ofbiz/webapp/control/LoginWorker.java
private static void setWebContextObjects(HttpServletRequest request, HttpServletResponse response, Delegator delegator, LocalDispatcher dispatcher) {
// ...
// 登录成功调用此方法
String tenantId = delegator.getDelegatorTenantId();
if(UtilValidate.isNotEmpty(tenantId)) {
// 获取默认数据源
Delegator baseDelegator = DelegatorFactory.getDelegator(delegator.getDelegatorBaseName());
List<GenericValue> tenants = null;
try {
tenants = baseDelegator.findByAnd("Tenant",
UtilMisc.toMap("tenantId", tenantId), null, false);
if(UtilValidate.isNotEmpty(tenants)) {
session.setAttribute("_tenantName_", tenants.get(0).get("tenantName"));
}
} catch (GenericEntityException e) {
e.printStackTrace();
}
}
}
数据库相关
- 创建账号
1 | select * from SAAS1.PARTY ORDER BY PARTY_ID DESC; -- 13000 |
- 清理数据库日志数据
1 | -- mysql |
- 清理账号信息
1 | -- 暂存需要删除的的用户信息 |
服务引擎
OFBiz定时服务(Job)
不推荐使用
- 要实现的功能:每隔一分钟在表sm_person中产生一条记录
配置实体
1
2
3
4
5
6
7<entity entity-name="SmPerson" package-name="cn.aezo.test" title="实体SmPerson">
<field name="id" type="id-ne"></field>
<field name="username" type="id-ne"></field>
<field name="password" type=" id-ne"></field>
<field name="description" type="description"></field>
<prim-key field="id"/>
</entity>先写一个service(java/minilang)
利用java写服务
service.xml中的配置
1
2
3
4<service name="createSmPersonService" engine="java" location="cn.aezo.service.MyJobTest"
invoke="createSmPerson" default-entity-name="SmPerson" auth="false">
<description>定时服务:产生一条SmPerson记录</description>
</service>cn.aezo.service - MyJobTest.java写该服务的实现
1
2
3
4
5
6
7
8
9
10
11
12public static Map<String, Object> createSmPerson(DispatchContext dctx, Map<String, ? extends Object> context ) {
Delegator delegator = dctx.getDelegator();
Map<String, Object> map = FastMap.newInstance();
map.put("username", "smalle");
map.put("password", "123456");
try {
delegator.create("SmPerson", map);
} catch (GenericEntityException e) {
e.printStackTrace();
}
return ServiceUtil.returnSuccess();
}
利用minilang写服务
service.xml中的配置
1
2
3
4<service name="createSmPersonService" engine="simple" location="component://aezo/script/MyJobService.xml"
invoke="createSmPerson" default-entity-name="SmPerson" auth="false">
<description>定时服务:产生一条SmPerson记录</description>
</service>hot-deploy/aezo/script/MyJobService.xml配置
1
2
3
4
5
6
7
8
9
10
11xml version="1.0" encoding="UTF-8"
<simple-methods xmlns:xsi="http://www.w3.org/2001/XMLSchema-instance"
xsi:noNamespaceSchemaLocation="http://ofbiz.apache.org/dtds/simple-methods-v2.xsd">
<simple-method method-name="createSmPerson" short-description="产生一条SmPerson记录">
<make-value entity-name="SmPerson" value-field="newEntity"/><!-- 创建一个SmPerson实体对象 -->
<sequenced-id sequence-name="SmPerson" field="newEntity.id"/><!-- 递增的主键 -->
<set field="newEntity.username" value="smalle"/><!-- 设置实体相应字段的值 -->
<set field="newEntity.password" value="123456"/>
<create-value value-field="newEntity"/><!-- 往数据库新增一条记录 -->
</simple-method>
</simple-methods>
设置定时并启动
利用dispatcher.schedule()方法
配置controller.xml
1
2
3
4
5<request-map uri="startMyJobTest ">
<security https="false" auth="false"/>
<event type="java" path="cn.aezo.service.MyJobTest" invoke="startMyJobTest "/>
<response name="success" type="none"/>
</request-map>cn.aezo.service - MyJobTest.java启动该服务的方法
1
2
3
4
5
6
7
8
9
10
11
12
13
14
15
16
17
18
19
20public static String startMyJobTest (HttpServletRequest request, HttpServletResponse response) {
LocalDispatcher dispatcher = (LocalDispatcher) request.getAttribute("dispatcher");
String jobName = "myJobTest"; //计划名
String poolName = "pool"; //默认方式
String serviceName = "createSmPersonService"; //计划执行的服务名称
Map<String, Object> serviceContext = FastMap.newInstance(); //服务需要的初始数据
long startTime = System.currentTimeMillis(); //开始时间
long endTime = System.currentTimeMillis() + 1000*60*60L; //结束时间
int frequency = 1; //频率(单位;RecurrenceRule.SECONDLY=1)
int interval = 60; //间隔(如果频率为RecurrenceRule.SECONDLY=1,则此处表示每60秒执行一次)
int count = 10; //次数
int maxRetry = 5; //最大重试次数
try {
dispatcher.schedule(jobName, poolName, serviceName, serviceContext,
startTime, frequency, interval, count, endTime, maxRetry);
} catch (GenericServiceException e) {
e.printStackTrace();
}
return "success";
}启动服务:在浏览器访问 https://127.0.0.1:8443/aezo/control/startMyJobTest
- 利用ofbiz的webtools工具,在浏览器访问https://127.0.0.1:8443/webtools/control/scheduleJob 默认用户名和密码:admin/ofbiz,还可以在此处查询到要运行的服务。起始时间必须是未来的某个时间点
通过配置文件设置定时
配置定时文件:hot-deploy/aezo/data/ScheduledJobs.xml(更多的配置规则请查看:framework/service/data/ServiceSeedData.xml)
1
2<TemporalExpression tempExprId="MINUTE_0_59" tempExprTypeId="MINUTE_RANGE" integer1="0" integer2="59"/>
<JobSandbox jobName="myJobTest" runTime="2000-01-01 00:00:00.000" serviceName="createSmPersonService" poolId="pool" runAsUser="system" tempExprId="MINUTE_0_59" maxRecurrenceCount="5"/>- TemporalExpression标签表示往数据表TemporalExpression(定时规则表)中插入数据。如果为tempExprId=”MINUTE_0_59” 为此定时规则id,tempExprTypeId=”MINUTE_RANGE”则表示分钟级别,如果是分钟级别integer1=”0” integer2=”59”表示从第0秒开始计时,59秒后计时完成并执行一次任务,即每分钟执行一次。
根据配置规则可知此段代码表示按分钟计算,每5分钟执行一次 - JobSandbox标签表示往数据表JobSandbox(定时任务表)中插入数据。其中jobId最好不要指定(他为数据表的主键,该任务下一次运行是根据上次运行的jobId来的);jobName为任务名称;runTime为任务运行时间(需要指定);serviceName任务运行时调用的服务名称;tempExprId为TemporalExpression(定时规则表)中的主键;maxRecurrenceCount表示定时任务执行次数(-1表示一直执行)。更多字段可以查看相应的数据表或者model配置文件。
- TemporalExpression标签表示往数据表TemporalExpression(定时规则表)中插入数据。如果为tempExprId=”MINUTE_0_59” 为此定时规则id,tempExprTypeId=”MINUTE_RANGE”则表示分钟级别,如果是分钟级别integer1=”0” integer2=”59”表示从第0秒开始计时,59秒后计时完成并执行一次任务,即每分钟执行一次。
- 注册此配置文件到ofbiz-component.xml中
<entity-resource type="data" reader-name="seed-initial" loader="main" location="data/ScheduledJobs.xml"/> - Load刚刚写的配置文件
- 法一:使用build.xml的load-demo等加载数据的命令(不推荐)
- 法二:登录到webtools:web管理工具 - 实体XML工具 – XML数据导入,在”完成xml文档”的”
”节点内部插入ScheduledJobs.xml中配置的定时信息 – 导入文本。
- 关闭定时
- 登录webtools:web管理工具 - 服务引擎工具 – 任务列表 – 找到需要关闭的定时任务 – 将等待中的任务取消掉即可
- 说明:只要定时任务没有完成,即使系统重新启动了,也会继续运行(因为数据库中JobSandbox存有该任务的信息)。但是如果将某个为完成的任务取消掉后,下次重启则不会再运行。
如果运行失败(找不到服务,但是确实又存在),可能是多个开发,有未及时更新代码导致的 - 修改定时任务池(framework/service/config/serviceengine.xml),如果启动多个节点可使用
1 | <!-- 默认池为pool,修改send-to-pool和run-from-pool --> |
webservice
- 定义服务(实现省略)
1 | <!-- |
- java调用,参考webservice.md
postman调用
- POST http://localhost:8080/webtools/control/SOAPService
- 请求体数据类型 raw xml
请求体数据
1
2
3
4
5
6
7
8
9
10
11
12
13
14
15
16
17<soapenv:Envelope xmlns:soapenv="http://schemas.xmlsoap.org/soap/envelope/">
<soapenv:Body>
<testWeb xmlns="http://ofbiz.apache.org/service/">
<map-Map>
<!-- 由于服务无参数,此处不传 -->
<!-- <map-Entry>
<map-Key>
<std-String value="name"/>
</map-Key>
<map-Value>
<std-String value="test"/>
</map-Value>
</map-Entry> -->
</map-Map>
</testWeb>
</soapenv:Body>
</soapenv:Envelope>得到的响应头如
1
2
3
4
5
6
7
8
9
10
11
12
13
14
15
16
17
18
19
20
21
22
23
24
25xml version="1.0" encoding="utf-8"
<soapenv:Envelope xmlns:soapenv="http://schemas.xmlsoap.org/soap/envelope/">
<soapenv:Body>
<checkEdiUploadStatusResponse xmlns="http://ofbiz.apache.org/service/">
<map-Map>
<map-Entry>
<map-Key>
<std-String value="responseMessage"></std-String>
</map-Key>
<map-Value>
<std-String value="success"></std-String>
</map-Value>
</map-Entry>
<map-Entry>
<map-Key>
<std-String value="successMessage"></std-String>
</map-Key>
<map-Value>
<std-String value="调用成功..."></std-String>
</map-Value>
</map-Entry>
</map-Map>
</checkEdiUploadStatusResponse>
</soapenv:Body>
</soapenv:Envelope>
权限
- 参考 ^1
- 设计思想简述:OFBiz采用的”安全组”(Security Group)来将”权限”跟”用户”联系起来。系统中有若干种权限,比如系统预置的权限、用户自定义的权限、资源的权限、操作的权限等等,这些权限会跟安全组建立关系(多对多的关系),而用户又与安全组建立关系(也是多对多的关系)。其中,系统预置权限,是以XML配置的方式导入数据表的。这些配置文件通常的路径为{Component | Application baseDir}/data/XXXSecurityData.xml。这里有对整个权限设计相关表的初始化数据。
- 如果新建的component的权限有OFBTOOLS,则新建权限组的时候,注意要给这个组加OFBTOOLS_VIEW权限
<SecurityGroupPermission groupId="PLATFORM_ADMIN" permissionId="OFBTOOLS_VIEW"/> 权限的定义方法
- Action是指对某一对象的权限操作如:_view、_create、_update、_delete
实体权限:实体权限是由实体+Action构成,比如对product实体可以定义product_admin、product_view、product_create、product_update、product_delete等。且系统规定如果拥有XXX_ADMIN权限,则拥有XXX_VIEW、XXX_CREATE、XXX_UPDATE、XXX_DELETE权限。如新建一个组件AEZO默认会生成文件
1
2
3
4
5
6
7
8
9
10xml version="1.0" encoding="UTF-8"
<entity-engine-xml>
<SecurityPermission description="View operations in the Aezo Component." permissionId="AEZO_VIEW"/>
<SecurityPermission description="Create operations in the Aezo Component." permissionId="AEZO_CREATE"/>
<SecurityPermission description="Update operations in the Aezo Component." permissionId="AEZO_UPDATE"/>
<SecurityPermission description="Delete operations in the Aezo Component." permissionId="AEZO_DELETE"/>
<SecurityPermission description="ALL operations in the Aezo Component." permissionId="AEZO_ADMIN"/>
<SecurityGroupPermission groupId="SUPER" permissionId="AEZO_ADMIN"/>
</entity-engine-xml>角色权限:角色权限要用到应用(application)的概念,比如在ofbiz中定义了三种应用ORDERMGR、FACILITY、MARKETING,角色权限的定义方法为:ORDERMGR_ROLE_ADMIN、ORDERMGR_ROLE_CLERK等
权限控制级别
登录级别
在每个Component的根目录下的ofbiz-component.xml文件下,有对于访问该component的最基本的权限定义。所谓最基本的权限,就是登录该component的用户需要至少拥有该文件内定义的权限才可以访问。示例:
1
2
3
4
5
6
7<webapp name="order"
title="Order"
description="OrderComponentDescription"
server="default-server"
location="webapp/ordermgr"
base-permission="OFBTOOLS,ORDERMGR"
mount-point="/ordermgr"/>见其中的”base-permission”属性。可以看到它包含了两个权限值: OFBTOOLS, ORDERMGR,这也意味着你必须同时拥有这两个权限(OFBTOOLS_VIEW 和 ORDERMGR_VIEW, ORDERMGR_ADMIN本质包含了ORDERMGR_VIEW)才能访问该组件
- request(controller.xml)级别
- 这里有两个重要的参数,所有component的webapp目录下controller.xml中的每个request(
<request-map>)标签有一个security(<security>)标签,包含了两个属性- https:定义是否对该请求应用SSL加密
- auth:定义是否需要登录才能执行该请求,因此只有在登录成功以后,并且在其他级别上的安全检查也通过了,该请求才会被执行
- 这里有两个重要的参数,所有component的webapp目录下controller.xml中的每个request(
component 菜单级别
- component的顶级菜单显示的组件将只对登录过的用户(并且这些用户至少具有”WEBAPP-NAME_VIEW”或者”COMPONENT-NAME_ADMIN”权限)显示。这种级别的访问控制实现在”appbar.ftl”(themes/flatgrey/includes/ appbar.ftl)中用以控制显示哪些应用程序的tabbar(顶级菜单)。Eg:admin属于安全组FULLADMIN,而如果将SECURITY_GROUP_PERMISSION中的groupId=FULLADMIN,permissionId=WEBTOOLS_VIEW的那条记录改为groupId=FULLADMIN,permissionId留空。则访问后台时顶级菜单中将不显示webtools组件的菜单项
当然如果修改appbar.ftl也可以控制哪些菜单不显示哪些显示。appbar.ftl默认遍历所有的组件,如果该登录用户有上面提到的两个权限中的一个就将他显示出来。appbar.ftl部分代码如下
1
2
3
4
5
6
7
8
9
10
11
12<#assign permission = true>
...
<#assign permissions = display.getBasePermission()>
<#list permissions as perm>
<#if (perm != "NONE" && !security.hasEntityPermission(perm, "_VIEW", session))>
<#-- User must have ALL permissions in the base-permission list -->
<#assign permission = false>
</#if>
</#list>
<#if permission == true>
...将此component菜单显示出来
</#if>
菜单级别
1
2
3
4
5
6
7
8
9<menu-item name="test" title="测试">
<condition>
<!-- 基于action的写法好处: TEST_ADMIN 权限包含了 TEST_VIEW 权限 -->
<if-has-permission permission="TEST" action="_VIEW"/>
<!-- 省略action: 必须有 TEST_VIEW 权限 -->
<if-has-permission permission="TEST_VIEW" />
</condition>
<link target="test"/>
</menu-item>screen级别
- 在每个component下的widget文件夹下的screen配置文件中,section节点下的condition子节点,存在一个名为if-has-permission的节点,它有两个属性:
- permission:标识位于哪个component
- action:标识执行的动作(包含下划线)
permission_action正好构成一个权限,示例
1
2
3
4
5
6
7
8
9
10
11
12
13
14
15
16
17
18
19
20
21<screen name="screenPermission">
<section>
<!-- 如果此登陆用户拥有ACCOUNTING_VIEW的权限则先执行actions中的代码,再显示widgets中的页面;如果没有权限则直接显示fail-widgets中的页面;即时在controller.xml中设置auth=false,此处未登陆的用户则视为没有权限 -->
<condition>
<if-has-permission permission="ACCOUNTING" action="_VIEW"/>
</condition>
<actions>
<set field="hello" value="hello ofbiz!"/>
</actions>
<widgets>
<platform-specific>
<html><html-template location="component://aezo/webapp/aezo/html/security.ftl"/></html>
</platform-specific>
</widgets>
<fail-widgets>
<platform-specific>
<html><html-template location="component://aezo/webapp/aezo/error/error.ftl"/></html>
</platform-specific>
</fail-widgets>
</section>
</screen>
- 在每个component下的widget文件夹下的screen配置文件中,section节点下的condition子节点,存在一个名为if-has-permission的节点,它有两个属性:
Freemarker模板片段级别
- security对象总是存在于screen的上下文对象——context中,你可以在模板中使用已定义的Java方法:hasPermission、hasEntityPermission、hasRolePermission
- ervice定义级别
- 你可以定义专门的”Permission service”在不同的安全模式、不同的component中进行复用,这里你可以通过扩展ECA的规则来在其中插入权限验证。具体超出了本篇的范文可以参考示例
exampleGenericPermission(example component下)
- 你可以定义专门的”Permission service”在不同的安全模式、不同的component中进行复用,这里你可以通过扩展ECA的规则来在其中插入权限验证。具体超出了本篇的范文可以参考示例
service编程级别
- Minilanguage:使用check-permission 标签,注:Minilanguage是OFBiz特有的基于XML的语言
Java:使用org.ofbiz.security.Security.API
1
2
3
4
5
6
7
8
9
10
11
12
13
14
15
16
17
18
19
20
21
22
23
24
25
26
27<simple-method method-name="createSmPerson" short-description="产生一条SmPerson记录">
<check-permission permission="AEZO" action="_CREATE" error-list-name="errorList">
<alt-permission permission="AEZO" action="_UPDATE"/><!-- 备用权限检查 -->
<!-- 给当前登录用户分配的备用权限, 若<check-permission>权限校验为false, 继续校验此标签配置权限, 若为true, 则权限校验通过; <alt-permission>可以多个 -->
<!-- check-permission 和 alt-permission 两者的关系是or的关系,即只要两者有一个满足权限要求即可。 -->
<fail-message message="您没有操作权限"/>
<!-- <fail-property resource="AezoUiLabels" property="AezoPermissionError"/> -->
</check-permission>
<!-- 不管check-permission检验的结果是true/false,最终后面的代码仍然会执行。如果为false就会将fail-message或者fail-property的值放到error-list-name中 -->
<if-has-permission permission="AEZO" action="_ADMIN">
<make-value entity-name="SmPerson" value-field="newEntity"/><!-- 创建一个SmPerson实体对象 -->
<sequenced-id sequence-name="SmPerson" field="newEntity.id"/><!-- 递增的主键 -->
<set field="newEntity.username" value="smalle"/><!-- 设置实体相应字段的值 -->
<set field="newEntity.password" value="123456"/>
<create-value value-field="newEntity"/><!-- 往数据库新增一条记录 -->
<else>
<log message="您没有管理权限" level="info"/>
</else>
</if-has-permission>
<if-not-empty field="errorList[0]">
<log message="${errorList[0]}" level="info"/>
</if-not-empty>
<log message="执行完毕" level="info"/>
</simple-method>
记录级别
- 比如对于一个有特定约束的实体,一个基于它的查询,必须要具有特定的权限才能取得相应的结果
- 角色受限的(或者基于角色)权限(又称Party Roles)
- 同如上的记录级别,通过使用RoleType、PartyRole以及相关的实体(如ContentAndRole)来进行控制。注:这里的角色倾向于业务规则,而完全不同于下面谈到的角色
- 安全角色
- 安全角色提供一个手段来将一个登录用户与一个特殊的OFBiz元素建立关联,举个例子,如果一个用户被分配有ORDERMGR_VIEW权限,而该用户又与一个特殊的团体有关联(假设称之为XYZ公司,该公司具有ORDERMGR_ROLE_UPDATE安全角色)。那么这么一组合将允许该用户浏览所有属于该公司的权限,并且可以只为该公司更新订单
表结构设计
- OFBiz对于权限这块的表结构设计,这里一共牵扯到6个数据表:
- SECURITY_GROUP
- SECURITY_PERMISSION
- SECURITY_GROUP_PERMISSION
- USER_LOGIN_SECURITY_GROUP
- PARTY_RELATIONSHIP
- SECURITY_PERMISSION_AUTO_GRANT
- SECURITY_GROUP:这就是上面提到的安全组对应的数据表,用户通过从属于某个安全组来间接与权限产生关系。一个安全组可以简单得认为是包含有N个权限的集合。
- SECURITY_PERMISSION:权限表,这里定义了系统中的所有权限。其中最主要需要关注的就是前两个字段:
- PERMISSION_ID 权限名称:通常以形如“Application_Operate”的形式进行定义(其中,Application表示具体的应用名称,Operate表示操作名称,常用的有CREATE/UPDATE/…)。当然了,也有一些特殊的命名方式比如:“MARKETING_VIEW”表示对MARKETING应用的页面拥有查看权限;”MANUAL_PAYMENT”表示人工支付的事务操作权限;”MARKETING_ADMIN”这里ADMIN作为后缀是一个特殊,表示它具有对MARKETING应用的所有操作权限。
- DESCRIPTION 对于PERMISSION_ID的简短描述
- SECURITY_GROUP_PERMISSION:如上面在设计思路中所述,这是Group与Permission的多对多关系表。从语义上也不难理解:一个安全组可以拥有多个权限,一个权限也可以从属于多个安全组。
- USER_LOGIN_SECURITY_GROUP:登录用户安全组,从表的命名方式上也不难看出,这也是一个多对多的关系表(注意观察主键定义)。我们可以看到,这张表并不只是将两张表的主键合起来作为联合主键,而是联合了FROM_DATE,三者联合作为主键。这里我们需要关注OFBiz数据表中普遍采用的一个设计模式——过期而非删除。也就是说,很多关系是有时效性的,这些时效性表现在”FROM_DATE”跟”THRU_DATE”两个字段上。如果发现当前记录已过期,那么就认为其无效,这就相当于我们传统意义上的删除记录操作。这种设计方式在关系庞杂的企业应用中可以避免在删除时被外键困扰而导致的各种异常以及数据一致性约束。
- PARTY_RELATIONSHIP:可以看到该表中包含有一个SECURITY_GROUP_ID字段,用来关联一个安全组(该字段通常都为null)。因为之前安全组只是跟用户产生关联,而用户也是Party的一种,Party可以包含任何的个人、用户、机构等。PARTY_RELATIONSHIP可以用于描述任何两个事物之间的关系,而这种关系有时不仅仅是人,因此他们有时可能也需要拥有权限,而不仅仅是登录用户才需要拥有权限。
关键代码解读
位于{Base_dir}/framework/security/src文件夹下,主要操作被抽象在名为Security的接口中
1
2
3
4
5
6public Iterator<GenericValue> findUserLoginSecurityGroupByUserLoginId(String userLoginId);
public boolean securityGroupPermissionExists(String groupId, String permission);
public boolean hasPermission(String permission, HttpSession session);
public boolean hasEntityPermission(String entity, String action, HttpSession session);
public boolean hasRolePermission(String application, String action, String primaryKey, String role, HttpSession session);
public void clearUserData(GenericValue userLogin);再来看看OFBiz中的默认实现(OFBizSecurity.java)中的关键代码:
1
2
3
4
5
6
7
8
9
10
11
12
13
14
15
16
17
18public boolean hasEntityPermission(String entity, String action, GenericValue userLogin) {
if (userLogin == null) return false;
// if (Debug.infoOn()) Debug.logInfo("hasEntityPermission: entity=" + entity + ", action=" + action, module);
Iterator<GenericValue> iterator = findUserLoginSecurityGroupByUserLoginId(userLogin.getString("userLoginId"));
GenericValue userLoginSecurityGroup = null;
while (iterator.hasNext()) {
userLoginSecurityGroup = iterator.next();
// if (Debug.infoOn()) Debug.logInfo("hasEntityPermission: userLoginSecurityGroup=" + userLoginSecurityGroup.toString(), module);
// always try _ADMIN first so that it will cache first, keeping the cache smaller
if (securityGroupPermissionExists(userLoginSecurityGroup.getString("groupId"), entity + "_ADMIN"))
return true;
if (securityGroupPermissionExists(userLoginSecurityGroup.getString("groupId"), entity + action))
return true;
}
return false;
}这是对于hasEntityPermission的最终实现,我们可以看到,它会首先尝试在entity中追加“ADMIN”字符串,也就是说,先查看超级权限,如果拥有超级权限,则直接认为拥有权限,否则才会去查看细粒度的具体权限
1
2
3
4
5
6
7
8
9
10
11
12
13
14
15
16
17
18
19
20
21
22
23
24
25
26
27
28
29
30
31public boolean hasRolePermission(String application, String action, String primaryKey, List<String> roles, GenericValue userLogin) {
String entityName = null;
EntityCondition condition = null;
if (userLogin == null)
return false;
// quick test for special cases where were just want to check the permission (find screens)
if (primaryKey.equals("") && roles == null) {
if (hasEntityPermission(application, action, userLogin)) return true;
if (hasEntityPermission(application + "_ROLE", action, userLogin)) return true;
}
Map<String, String> simpleRoleMap = OFBizSecurity.simpleRoleEntity.get(application);
if (simpleRoleMap != null && roles != null) {
entityName = simpleRoleMap.get("name");
String pkey = simpleRoleMap.get("pkey");
if (pkey != null) {
List<EntityExpr> expressions = new ArrayList<EntityExpr>();
for (String role: roles) {
expressions.add(EntityCondition.makeCondition("roleTypeId", EntityOperator.EQUALS, role));
}
EntityConditionList<EntityExpr> exprList = EntityCondition.makeCondition(expressions, EntityOperator.OR);
EntityExpr keyExpr = EntityCondition.makeCondition(pkey, primaryKey);
EntityExpr partyExpr = EntityCondition.makeCondition("partyId", userLogin.getString("partyId"));
condition = EntityCondition.makeCondition(exprList, keyExpr, partyExpr);
}
}
return hasRolePermission(application, action, entityName, condition, userLogin);
}上面的代码可以看到,在方法内部会先尝试调用hasEntityPermission,如果没有权限,则尝试在application后面追加”_ROLE”字符串来查看角色权限是否拥有,如果拥有则,直接返回,否则才会根据相关的Entity-NameRole表继续查找
Security Group vs RBAC
- 在OFBiz中弱化了角色的概念,强化了安全组的概念
- RBAC常见于单一的系统设计,在单一的系统中,角色这个词定位准确而清晰;而在OFBiz中,它的目标是构建出一套ERP的平台(包含多个异构系统)
- 在跨越多个系统之上谈角色,反而变得模糊不清,导致混乱,但采用安全组的概念却不至于,安全组的概念使得权限的载体的粒度更细、更灵活,但同时也更为繁杂,
- 其实OFBiz中还是有角色这个概念的(体现在权限中包含_ROLE的权限,可将其视为角色权限)
- 而常用的RBAC中通常也用到这种安全组的概念(一个特殊用户,需要分配有跨越多个角色的权限时,这时需要对该用户的权限进行定制化,这是就用得上类似的安全组的概念)
渲染引擎
此处的form表中最终会渲染成html中的form标签。如
此文件包含一个forms标签,然后forms标签中可以包含多个form标签,每一个form标签代表一个表单,在XXXScreens.xml中通过其name属性进行引用。
1
2
3
4
5
6
7
8
9
10
11
12
13
14
15
16
17
18xml version="1.0" encoding="UTF-8"
<forms xmlns:xsi="http://www.w3.org/2001/XMLSchema-instance"
xsi:noNamespaceSchemaLocation="http://ofbiz.apache.org/dtds/widget-form.xsd">
<form type="single" name="autoAttributes" default-entity-name="SmPerson" target="autoAttributesTarget" target-type="intra-app">
<field name="username">
<text></text>
</field>
<field name="password">
<text></text>
</field>
<field name="description">
<text></text>
</field>
<field name="submit">
<submit/>
</field>
</form>
</forms>
页面显示流程:Handle - Request-map - View-map
<property-map resource="CommonUiLabels" map-name="uiLabelMap" global="true"/>中的resource=”CommonUiLabels”指的是该项目下的config目录下的CommonUiLabels.xml文件- Decorator是一个页面模板,该模板也是一个screen元素
- Screen,暂时理解为展示屏。一个我们可以浏览的网页,能够包含一个或多个Screen
1 | Screens |
FTL说明
1 | <!-- |
其他
零散
- 修改xml文件一般不需要重新部署,何时需要重启OFBiz
- 下更改时需要重新启动OFBiz服务器
- Java文件(记得要重新编译)
- 配置/.properties文件
- entitymodel或entitygroup XML定义文件
- 服务或secas XML文件
- JPublish XML文件
- 下修改时无需重新启动OFBiz服务器,但有可能你需要在浏览器中清除缓存
- freemarker FTL模版
- beanshell BSH模版
- Screens XML文件
- Forms XML文件
- 控制器XML文件(注意:在opentaps-0.8和OFBiz 3.x及更早版本中,你在更改控制器时需要重启)
- groovy文件
- script文件夹中与service实现相关的xml文件
- 远程调试,修改了service和entitymodel需要重启
- 下更改时需要重新启动OFBiz服务器
- request-map中的uri区分大小写,即在浏览器中输入的url也区分大小写
- 登录进了PLSQL Developer,但是还是不显示数据库中存在的表,重新选择一下当前用户
- 如果改变了entity中字段类型,需要删除表或者手动修改字段。重新部署是更新不了的
- ofbiz在配置的controller.xml中uri调用的java方法必须是static
- 不要把sevice当event用,service就应该是无状态的,只能从上下文获取数据,service中不能访问session 或 request
\framework\entity\config\entityengine.xml中的schema-name需要填写数据库用户名(不区分大小写)entitymodel.xml
- 支持将手动创建的视图(create view xxx)映射成实体(entity), 并且也支持通过view-entity进行嵌套关联此类型视图实体
view-entity 视图,一般只用于查询
1
2
3
4
5
6
7
8
9<view-entity entity-name="YtQuoteAdjustmentView" package-name="x.y.z">
<member-entity entity-alias="QA" entity-name="QuoteAdjustment" />
<member-entity entity-alias="QAT" entity-name="OrderAdjustmentType" />
<alias-all entity-alias="QA" /><!-- alias-all 将某个实体的全部字段定义进来 -->
<alias entity-alias="QAT" name="quoteAdjustmentType" field="description" />
<view-link entity-alias="QA" rel-entity-alias="QAT" rel-optional="true"><!-- rel-optional="true"内连接 -->
<key-map field-name="quoteAdjustmentTypeId" rel-field-name="orderAdjustmentTypeId" /><!-- 表连接(join):根据(on)QuoteAdjustment的字段quoteAdjustmentTypeId和参考表OrderAdjustmentType的字段orderAdjustmentTypeId -->
</view-link>
</view-entity>
screen.xml中查询数据
- 查询一条记录entity-one
- 查询多条记录entity-and
查询条件field-map
- field-name数据库中的字段
- from-field请求穿过来的数据,通过
parameters.字段获取当前上下文数据,或者通过value传入固定值
1
2
3
4
5
6
7
8
9
10
11<actions>
<set field="headerItem" value="main" />
<entity-one value-field="pr_buyer" entity-name="PartyRole">
<field-map field-name="partyId" from-field="userLogin.partyId"/>
<field-map field-name="roleTypeId" value="YT_BUYER"/>
</entity-one>
<entity-and list="orderBaseFeeList" entity-name="OrderAdjustment">
<field-map field-name="orderId" from-field="parameters.orderId" />
<field-map field-name="orderAdjustmentCategoryId" value="BASE_FEE"/>
</entity-and>
</actions>
controller.xml
1
2
3
4
5
6
7
8
9
10<request-map uri="main">
<security https="false" auth="true" />
<!--
type="request" url不变,内部请求
type="request-redirect" url改变,重定向,基于相对目录(/controller/myapp/)
<redirect-parameter name="orderId"/> name要和service返回的字段一样,他会自动附上值
type="cross-redirect" rul改变,内部重定向,基于根目录(127.0.0.1:8080)
-->
<response name="success" type="request-redirect" value="hello" />
</request-map>
日志
- 默认日志生成策略
- 访问日志每天生成一个文件,堆场项目每天会生成一个大小为300M的文件
- 普通日志每天最多生成10个文件,每个文件大小为1M(超过文件数量会覆盖当天较早的日志)
- 错误日志每天最多生成3个文件,每个文件大小为1M
- 日志生成策略配置:
framework/base/config/log4j2.xml- 可修改fileName属性从而更改日志生成路径
framework/catalina/ofbiz-component.xml可修改access_log日志路径
- 日志生成级别配置:
framework/base/config/debug.properties
常见问题
- 同样的代码部分机器出现启动成功但是页面无法显示。出现场景:使用ofbiz-13.07,windows安装jdk1.8,访问地址是可以进入到event,如果渲染的视图中包含ftl或者多个汉字则无法显示(很简短的一段html代码可正常显示),通过curl可以返回html代码,火狐浏览器提示编码格式不正确,此时降低jdk版本为jdk1.7(ofbiz-13.07官方提交jdk1.7)可正常访问.(部分机器jdk1.8也可正常运行)
Couldn't create server socket(/127.0.0.1:10523)原因是服务已经启动,再点击start就提示端口占用。解决办法:先stop一下,再start- 报错
Incompatible class: com.alibaba.fastjson.JSONArray- OFBiz对请求参数做了安全校验,只允许常见的类型。如果request.setAttribute设置进去了一些特殊的类型,然后 request-redirect 重定向到页面时会就会包此问题 (request-redirect-noparam也无法清除Attribute里面的参数)
类加载顺序调试
- 引入jvminspect.jar
- 将下列代码加到启动参数,即build.xml的start-debug中
1 | <!-- |
自定义启动脚本
- Windows
1 | title=ofbiz-test |
- 一台服务器有多个OFBiz项目启动还存在问题,会全部重启
1 | ################################### |
打包docker镜像
- Dockerfile
1 | ARG AEZO_DOCKER_REGISTRY=192.168.1.100:5000 |
- docker-build.sh
1 |
|
.dockerignore类似.gitignore进行配置- build.xml
1 | <property name="projectDir" value="${basedir}/.." /> |
集群配置Session共享(基于redis)
- 参考:https://www.wyl.im/archives/61
- 测试使用4.0:https://github.com/ran-jit/tomcat-cluster-redis-session-manager/releases/tag/4.0
- 需要commons-pool2-2.6.2.jar,总共4个jar
- CatalinaContainer
1 | String redisEnable = UtilProperties.getPropertyValue("general", "redis.session.enabled", "false"); |
- LoginWorker
1 | // 退出登录 |
- 设置redis命名空间(修改源码后重新编译然后将jar放到framework/catalina/lib目录)
1 | // tomcat.request.session.data.cache.impl.redis.RedisCache |
- 解决externalLoginKeys问题(还需将LoginWorker类中相关代码替换掉)
1 | public class ExternalLoginKeyRedisManager { |
注册到nacos
参考文章
